| Quote: |
| "Primum non nocere--Above all, do no harm" |
I. Preface
--A. Introduction to the Priest Class
--B. Who am I?
--C. Credits
--D. Helpful Links
II. Stats
--A. Stats - What they do for you
--B. Stat Builds
---1. Priest
---2. High Priest
III. Skills
--A. Acolyte Skills
--B. Priest Skills
--C. High Priest Skills
--D. Skill Build
IV. Leveling
--A. Solo
--B. Partying
V. Equipment
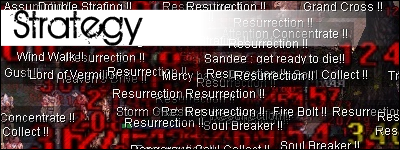
VI. Strategy
--A. SP Conservation
--B. Partying
---1. Who gets what Buff?
---2. Buff Timing
--C. Battle Mode
Introduction to the Priest Class
| Quote: |
| “While serving God and witnessing the miracles, the Priest is the only one that decides to join the world of adventure following the voice of God. "He/She helps the group by casting supportive spells, and with a well-trained spirit helps members of the group Heal. Also, he/she has exceptional fighting skills against Undead monsters and by purifying their souls, returns them to the ground. "If you happen to join parties with a strong Priest, you will be able to receive help from their supportive skills that also possess the ability to attack enemies.” ~Description of the Priest Class from the main iRO Website |
Priests are the clerics of Rangarok online. By default, Priests are meant to heal and strengthen their allies while bringing doom on everyone else. Some Priests turn away from this path and instead follow the path of battle or exorcism. This guide was written to help those who want to follow the true path of Priesthood and bring salvation to their friends…
…While still giving a hearty dose of mayhem to their foes.
Who am I?
My name in-game is .Dusk, a High Priest. I’ve been playing Ragnarok Online for four years this November. I was around before they remade the Novice grounds, before they even made the Iris server, and before the transcendent classes, for those from the official servers. On iRO Iris, I’ve been in five guilds (One of them my own) and have been through my share of War of Emperium.
My first character was an Acolyte, because the personality test on the main website said that it was the class that suited me. Back then, I had no idea what I was doing.
Now, I like to think things are a bit different. After years of playing as a Priest, I’ve gathered a few helpful little tips and developed my own way of playing, which I’ll share with you here. Don’t take any of this as the rules; these are guidelines to help you develop your own path through FS Priesthood.
Notes:
- I loathe tanking and leeching for levels amoung people who are absolutely capable of leveling on their own. You'll find none of that here.
- I also have difficulties with parties at lower levels. As you can see, my section on solo leveling is much more detailed. If anyone wants to help with the party leveling, please do. =)
- Buff anyone who asks. Nothing is more annoying than being in a town full of priests and not getting a single buff.
Credits
Feel RO for making a Ragnarok server I can afford to play on. *shot*
Lord Disa of roempire for making the first FS Priest guide I found useful (This guide was based on his and you’ll see the similarities).
Lady Lumen for her stellar guide, which I swear I had up constantly through my Acolyte days.
Useful Links
Rate my Server
Doddler’s Stat Calc
Lord Disa’s FS Priest Guide
Lady Lumen’s Acolyte Guide
Ragnarok Online Priest Information
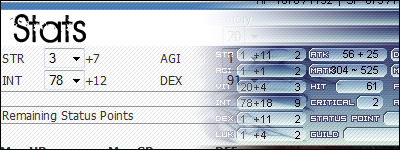
Stats: What they do for you
STR: For Priests, not much. STR’s only use to us is in weight limit increase, which allows us to carry more green potions and blue gems. =)
AGI: The dodging and ASPD stat. It only works well in huge amounts (80+). Since we won’t be dodging nor attacking, we don’t need it
VIT: The other defensive stat. Each point gives you a 1% resistance to poison, stun, and silence(!) and raises your physical defense. While Priests aren’t meant to be tanks, this will help you stay alive that much longer, which means your party members stay alive.
INT: The Priest’s main stat. This stat increases your heal amount, MDEF, Max SP, and SP regen.
DEX: DEX is an important stat because it decreases the casting time of spells, which means you can get off those nasty long spells faster.
LUK: This stat is mostly for TU builds. The only use it has for an FS build is the occasional Lucky Dodge…it’s called ‘Lucky’ for a reason.
The Stat Builds
Priest
Character Making - 9 INT, 9 VIT, 9 LUK. Then reset your stats. Put everything in INT. You will die quite a lot at first (If you want, you can add some VIT. Just reset again later), but your MATK will crush those Undead.
INT/VIT Build
99 INT
92 VIT
1-5 STR
30-31 DEX
1 LUK
1 AGI
Status. Immunity. No silence. The huge amounts of INT and VIT mean that hardly anything can touch this Priest, which means that the Priest can concern himself with healing the others. You’ll rarely run out of SP and your heal damage is phenomenal.
DEX is here to relieve some of the pains of long spell casting. The only spell that truly needs it is Mag, but people will whine if I don’t put some DEX in. D=
STR is optional. 5 STR will put strength right on the 10 STR bonus. It’s only use is for increased weight limit so you can carry more green potions and blue gems. And heck, by the time you get STR, you’ll be ready to trans anyway.
However, this is an old, old, old build, which means it’s outdated. Tweak it to your needs, but it’s a good place to start.
Building -
Maximize INT very first. You should get 99 INT around level 65. Then take VIT to 50-80, max DEX, and then max VIT
INT/DEX/VIT Build
90 INT
50 VIT
1 STR
85 DEX
1 LUK
1 AGI
Fast casting is what this Priest specializes in. However, defense is greatly sacrificed. If you use this build, don’t get hit! You can reverse this build by switching the VIT and DEX to make a Priest that can still cast quickly while taking some damage.
Building -
Take INT to 80-90, then work on VIT, then DEX, then VIT, and then INT again if you didn’t max it at first.
Note: No, I don’t give a TU or ME build. For one, this is an FS guide. Two, I suck at TU and would just be teaching you wrong if I tried to explain a TU/ME build. There are plenty out there, though, if you’re interested. =)
High Priest
78 INT
73 VIT
91 DEX
2 STR
1 LUK
1 AGI
What’s this? No 90+ INT? That’s because, as a High Priest, your Heal is going to be ridiculously powerful anyway and you can concentrate on the other stats. VIT is also lowered by the same logic; your DEF is going to be high as well. Now you can focus more on fast spell casting. This is the build I’m using so far. I may lower DEX and raise VIT later, but I like it as it is so far.
(Skill Effects from Rate My Server)
Acolyte Skills
Divine Protection
Effect - Reduces damage from Undead property and Demon family monsters by 3 * SkillLV + 0.04 * (BaseLV + 1). Damage is subtracted after DEF reductions. Base increment without BaseLV modification:
Comment - More of a prerequisite for Blessing than anything, although it does help reduce damage somewhat.
Demon Bane
Effect - Increases damage against Undead property and Demon family monsters by 3 * SkillLV + 0.05 * (BaseLV + 1). Damage ignores DEF reduction from armor, but not from VIT. The skill bonus increases with higher character BaseLV. Base increment without BaseLV modification:
Comment - As an FS character, this has no use. Now if it increased MATK…
Ruwach
Effect - Reveals Hiding and Cloaking players and monsters within range. Revealed players and monsters are hit with a holy element Magic attack with a strength of MATK*1.45.
Comment - If you do WoE, keep this skill up constantly to catch any Sins trying to sneak by.
Pneuma
Effect - Creates a 3x3 cell cloud (although the animation only appears to cover the center cell!) around the target cell that blocks all ranged Physical attacks. This means that it also blocks the bow attacks of players, so take care not to prevent any Hunters or Bow Thieves in the party from being able to do damage! Monsters count as being "ranged" if their attack has a range of 4 or more cells. Pneuma cannot be cast if it is targeted to overlap an already existing Pneuma area or a Safety Wall cell. Does not block splash damage or negate the Flee reducing effects of having multiple targets attacking you. Do note that although you can see the animation on top of a Land Protector, Pneuma will have no effect.
Comment - This skill finds the most use in Amatsu Dungeon and in WoE. In WoE, put it next to stationary characters like wizards and other priests to keep them from getting sniped in battle.
Pneuma’s AoE works like this:
XXXXX
XOOOX
XOPOX
XOOOX
XXXXX
X = Spaces unaffected by Pneuma
O = Spaces affected by Pneuma
P = Pneuma’s target cell
Teleportation
Effect - At level 1, you can teleport to a random spot on the same map. At level 2, you can also choose to teleport to your save point. When Teleportation is actually cast, a window will appear showing the available options (including cancel!). You must actually select an option by clicking or with the up/down arrow keys and pressing enter for the effect to occur. Once you actually teleport, you will count as having "just entered the map". This means that Aggressive monsters won't see you for 3 seconds or until you move.
Comment - Useful both in getting to other places quickly (Like the Anubis map) and in running from Mimics.
Warp Portal
Consumes Blue Gemstone
Effect - Creates a warp portal at the targeted cell after a destination is selected from a list. This spell cannot be cast under a monster or player. If anyone steps onto the targeted cell while the destination is being selected, the spell will fail. After successful casting, anyone stepping onto the affected cell will be teleported to the selected destination. The destinations that may be selected are set by the use of the /memo command while standing in the desired location and by your current Save Point. You may not set a memo point on Indoors map (dungeons and inside buildings in cities). If you make a new Memo Point on a map where you already have a Memo Point, that Memo Point will be replaced. After filling all 3 possible Memo Points, setting a new Memo Point will replace the oldest current Memo Point (the bottom one on the list). The number of Memo Points available to you is equal to the SkillLV - 1 (therefore, at level 1 you have no memo points available and can only cast a Warp Portal to your Save Point). The maximum capacity of people that the caster can warp at a time is 8 regardless of its skill level. No more than 3 Warp Portals cast by the one caster can be in effect at the same time. If the caster leaves the map where the portal has been cast, the portal disappears.
Comment - This sees so much use in iRO, but very little in servers with Warpras. Nevertheless, it is useful in warping to exact locations or places that the warpra just doesn’t warp to. Mine locations are right in front of the Glast Heim Church, Nifflheim, and a pond in Prontera field where I can load up on Holy Water.
Heal
Effect - Heals a target's HP for [(BLV + INT) / 8] * (4 + 8 * SkillLV). When used against Undead property monsters, it is a holy attack that ignores MDEF and INT, but deals only half damage (that is, HealValue*ElementModifier/2). To use against a monster, you must shift-click it or turn on /noshift.
Comment - THE Priest/Acolyte Skill. There is no reason to not get this. You will use it on yourself, comrades, and zombies constantly for your entire Priest career. Keep it on an easily accessible hotkey.
Note: You don’t have to type /noshift. /ns works just as well.
Increase Agility
Effect - Increases AGI of target by 2 + SkillLV and increases movement speed by 25%. Casting is accompanied by the "AGI UP" message over the target. Dispels Decrease Agility when cast. Dispelled by Decrease Agility and Quagmire. A monster or player in the area of effect of a Quagmire spell cannot receive the benefits of Increase Agility. This skill consumes some HP along with the SP cost.
Comment - Once you’ve gotten used to Inc. Agi, you’ll find anything else horribly slow. The amount of HP it saps is so miniscule you’ll never notice it unless you run around buffing every person you see constantly.
Decrease Agility
Effect - Decreases AGI of target by 2 + SkillLV and reduces movement speed by 25%. The skill can fail and success is indicated by the text "AGI down" on the target at the time of casting. A successful cast will dispel Increase Agility, Adrenaline Rush, Two-Hand Quicken, Spear Quicken and Cart Boost. This skill will not work on Boss monsters. The effects of this skill combine with Quagmire in the form AGI/2-2+SkillLV. The formula for success is believed to be SuccessRate = 40 + SkillLV*2 + (BaseLV + INT)/5 - Target MDEF where SuccessRate is expressed as a percentage. Duration is halved on players.
Comment - This skill sees more use in PvP situations, but it also works in kiting caster sensor monsters such as Mi Gao.
Aqua Benedicta
Consumes Empty Bottle
Effect - Creates 1 Holy Water. Caster must stand in water for the skill to succeed. Map-wide submersion (Undersea Tunnel LV 4/5 or Sunken Ship) does not work.
Comment - Find a good puddle somewhere and save it as a /memo so you can warp there whenever you need more.
Signum Crucis
Effect - Reduces the DEF (not VIT DEF) of Undead property and Demon family monsters on screen by 10% + 4% * SkillLV (further modified by target- and caster base levels). The skill can fail on a monster, the formula for success is believed to be SuccessRate in %= 23 + SkillLV*4 + BaseLV - TargetLV. The monsters affected are indicated by the sweat drop emotion (
 ). It has been said that this is a rare skill that can work even on a Boss monster, but I have no confirmation of this. The effect of Signum Crucis stacks with the effects of Provoke.
Comment - It may not be in the default skill build, but I find this spell strangely amusing. With a battle priest, this skill may see some use.
Angelus
Effect - Increases the DEF from VIT of all party members on screen by 5%*SkillLV. Does not increase anything else that has to do with VIT at all.
Comment - So-so. At a high enough level and with a party full of VIT characters, this could be useful.
Blessing
Effect - Increases STR, DEX and INT of the target by 1 * SkillLV and removes any Curse effect. If used on Undead property or Demon family monsters, it halves their STR, DEX and INT, regardless of skill level. This "Bless Curse" or "Offensive Blessing" will lower the HIT and MATK of a monster, but has no effect on ATK. This effect does not work on Boss monsters.
Comment - This skill increases all three offensive stats! How can you go wrong? Of course, in lower levels, it takes a lot of SP, but it’s worth it.
Cure
Effect - Cures Blind, Confusion and Silence (limitation: you can't cure yourself from Silence since you can't cast while Silenced).
Comment - If only you could insolence yourself…Unsilencing your allies if useful, however.
Holy Light (Quest Skill)
Effect - Does a single Holy element hit for 125% of your MATK.
Comment - The Acolyte’s sole ‘true offensive’ skill. This is of some use in WoE (provided you have a Soul Linker with Priest Spirit standing by) and helps when traveling to the GH Church. If you run into a Gargoyle, Pneuma yourself and just Holy Light it.
Priest Skills
Increase SP Recovery
Effect - Recovers SkillLV*(Maximum SP/500 + 3) SP per 10 full seconds when standing still and increases the efficiency of SP recovering items by +2% per SkillLV.
Comment - By the time you’re a Priest, SP shouldn’t be that much of a problem. This skill is a prerequisite for Res, Assumptio, and Meditatio.
Safety Wall
Consumes one Blue Gemstone
Effect - Creates a Safety Wall effect in 1 cell. The effect will protect anyone standing on that cell from 1+SkillLV Physical attacks. The attacks do not have to hit to count against the total number of protected hits. Multiple Safety Walls do not stack on one cell. Skills from monsters closer than 4 cells are considered as melee attacks.
Comment - Similar to KE, but you’re stuck in one place. Great for spell-casters, but…
Resurrection
Consumes one Blue Gemstone
Effect - Returns a dead character to life with the indicated percentage of HP restored (see list below). When used on Undead property monsters, it has a chance to instantly kill or at least damage in the same way as Turn Undead at the same level.
Comment - Can you imagine life without this skill? The first couple of levels are unbearably slow and only partially recover HP. It’s best to max it.
Mace Mastery
Effect - Increases damage with Maces by +3*SkillLV. This damage ignores modification from Armor and VIT defense, but not from Elemental and Card modifiers and applies to all hits for multi hit attacks.
Comment - Only for Battle Priests or the odd few who really, really, really want Mana Recharge
Impositio Manus
Effect - Gives the Impositio Manus effect to the target. This effect increases the targets minimum and maximum weapon ATK (even with bare hand) by 5*SkillLV. This means the damage is modified by Size and reduced by DEF (both Armor and VIT). Can be used on self. You can change weapons at any time during the effect of this spell without disrupting it. When a second instance is cast on a target, then it will replace the first instance.
Comment - Exceedingly useful for melee characters
Suffragium
Effect - Reduces Cast Time of the next spell cast by target (if started within the duration). Has no effect on a spell that is already being cast (will effect the next spell instead). The casting of a 0 Cast Time spell will use up the effect with no benefit. Cannot be cast on self. When a second instance is cast on a target, then it will replace the first instance.
Comment - If only you could use it on yourself…If you have another priest in your party, cast Suff on each other.
Aspersio
Consumes Holy Water
Effect - Aspersio changes your own or an Allies weapon property to Holy. Changing or removing the weapon will cancel the effect prematurely. When a second weapon enchanting spell effect (from Enchant Poison or Aspersio currently) is cast on a target, then it will replace the first spell effect. Aspersio can also be used as a weak attack. Using shift-click, you can target an Undead property or Demon family monsters and inflict 40 points of Holy property damage that ignores all defenses. Against other kinds of monsters, it does no damage, but consumes the Holy Water and SP anyway.
Comment - I had no idea Aspersio could be used offensively…O_o Can’t you just see a Priest running around, splashing holy water in the faces of zombies? Anyway, use this skill when in a dungeon skilled with shadow and undead monsters.
Benedictio Sanctissimi Sacramenti
Effect - This skill changes the elemental property of all characters in a 3x3 area around the targeted cell to Holy1. It also does an amount of Holy damage equal to half the power of a Heal of the same Skill Level to Undead property and Demon family monsters in the area of effect. It requires one Priest, Acolyte or Monk in a cell next to the caster to work (yes, that means the caster and 2 extra characters).
Comment - Never in four years of playing have I seen someone use this skill. I guess it could be useful, but that 3 Aco-class characters requirement kills it.
Sanctuary
Consumes Blue Gemstone
Effect - Creates a 5x5 area sanctuary effect around the targeted cell. Characters and non-undead/demon monsters within the sanctuary are healed (see amount below) once a second unless at Maximum HP. Undead property and Demon family monsters take Holy property damage equal to half the sanctuary's heal, rounded down and are knocked back out of the effect each time. The maximum number of valid healing targets is equal to 6+2*SkillLV, the maximum number of valid damage targets is equal to 3+SkillLV. The spell affecting one player or monster once is counted as 1 target. If it affects a player or monster more than once, then it will count as a valid target more than once. If the maximum number of valid targets is exceeded, the spell will come to an end prematurely. Multiple Sanctuaries can be stacked on each other and as long as the maximum number of valid targets is not exceeded, each will last to their full duration.
Comment - Getting a mountain of ‘heal PLZ!’ requests? Lay down a Sanct. Problem solved. =D
Note: Sanctuary is the one of the two only means of healing the Emperium in the War of Emperium battles. While it is a skill that is by no means essential to have in a War of Emperium priest, have one or more priests with a high level of the skill in a guild could be very useful.
Slow Poison
Effect - Stops damage from a Poison effect and allows you to recover HP/SP normally. However, does not actually cancel the Poison effect, so the DEF reduction effect is still a problem.
Comment - Have you ever met anyone in the game who’s actually died from poison damage? The DEF reduction is the real killer in poisoning, not the damage.
Recovery
Effect - Cures Frozen and Stunned effects on players. Causes non-Undead property monsters to lose their target. Passive monsters will stop attacking, while aggressive monsters will choose a new target. Status Recovery may inflict Blind effect on Undead property monsters. The chance of this occurring is equal to (100 - (MonsterINT/2 + MonsterVIT/3 + MonsterLUK/10)) %. A successful blinding will be accompanied by the usual chirping sound. The duration of the Blind effect believed to be 30 * (100 - (MonsterINT + MonsterVIT)/2)/100 seconds. One Blind effect cannot overlap another.
Comment - Oh so very useful in WoE, once the Storm Gust is over.
Kyrie Eleison
Effect - Creates a Kyrie Eleison effect on the target character. This effect will block MaxHPofTarget*(10% + 2%*SkillLV) damage OR 5 + [SkillLV/2] hits, whichever is reached first. Damage in excess of the amount blocked will transfer through and count as a hit of lowered damage. Hits are only assessed when a blow would normally land and not for every swing by a monster (despite showing a "Guard" graphic with every swing for the effected player and a miss for every other player). Any Magic attack will do full damage to the affected target, while still counting against the maximum damage and number of hits of Kyrie Eleison. Casting Holy Light or Assumptio on someone with this effect will cancel it entirely. When a second instance is cast on a target, then it will replace the first instance.
Comment - Easily one of the most important defensive skills for a Priest. Using it on a player with Assumptio on is bad manners, however. Don’t do it. D=
Magnificat
Effect - Increases the natural HP and natural SP recovery speed to 200% for all affected party members. This does not affect the Increase HP Recovery and Increase SP Recovery skills. When a second instance is cast, then it will replace the first instance on any affected targets.
Comment - When you’re out of SP and surrounded by Evil Druids, this may be the skills that saves you. Keep it up at all times, if possible.
Gloria
Effect - Gives the Gloria effect to all characters in party near the caster. The Gloria effect adds LUK +30. When a second instance is cast, then it will replace the first instance on any affected targets.
Comment - It doesn’t last long, but for a CRIT-based character, it’s long enough. It also helps in casting TU.
Lex Divina
Effect - This skill has a chance of inflicting the Silence effect on the selected target. It does not work against Boss monsters. The chance is equal to 100 - (TargetVIT + TargetLUK/8) + INT/15 %. Casting this spell on a target that is already silenced will replace the previous Silence effect.
Comment - There are many times when my party would have died without this skill. This prevents Banshees from doing that one AoE spell, Anubis from Sonic Blow, and stops spell-casting in WoE. Sucks if you get silenced yourself, though.
Lex Aeterna
Effect - The target will take double damage from the next damage source. Healing, misses and status effects do not trigger the effect. Cannot be cast on a Frozen or Stone Cursed target.
Comment - Imagine Soul Breaker. Imagine Soul Breaker with 200% damage. (Or any other skill.)
Magnus Exorcismus
Consumes Blue Gem
Effect - Calls down a Grand Cross in a 7x7 area around the targeted cell. Any Demon family and Undead property monsters entering the area of the effect suffer Holy property damage of MATK*SkillLV per wave. Waves occur approximately every 3 seconds and each wave appears to hit SkillLV times. Therefore, there is a certain maximum number of waves than any one monster can be affected during the duration of the spell (there will be less waves if the monster enters late or is knocked back out for any reason). As it creates an effect on the ground, Magnus Exorcismus cannot stack with other ground effect skills (e.g. Pneuma and Safety Wall).
Comment - Great if your planning on an ME Priest. It might be kinda fun. =)
Redemptio (Quest Skill, job level 40+)
Effect - Kill yourself (and receive EXP penalty), but revive all other dead party members near you. All revived players will have recovered 50% of their HP. The more party members you revive, the less EXP penalty you get. Casting time is 4 seconds, and this skill ignores DEX for casting time reduction. Will not work if your current EXP is below 1%. Editor's Note: I speculate the EXP loss to be (1-Resurrected Members)*0.01%
Comment - Ruined by the casting time, but an otherwise epic skill. If you’re the only one alive in a large party and, for some reason, the monsters aren’t going after you (Or you’ve got Safety Wall), then it might be useful. I like using it because it seems like very few outside of the Priest class know about it and I enjoy the “WTF was that?!?!” >D
High Priest Skills
Assumptio
Effect - The blessing of Virgin Mary. The persons who receive this will benefit from damage reduction for a limited amount of time. The reduction is 1/2 on normal PvM maps and 1/3 on PvP maps. It is disabled in WoE and GvG maps. Casting Kyrie Eleison on someone that has Assumptio will cancel Assumptio, likewise casting Assumptio on someone with Kyrie will cancel Kyrie. This skill affects people around you
Comment - Very good skill, but don’t accidentally use KE after Assumptio.
Basilica
Consumes 1 Blue Gemstone, 1 Red Gemstone, and 1 Yellow Gemstone
Effect - This skill creates a absolutely perfect defense zone of 5x5 cells around the caster that blocks any type of attack out of~ or into this area. Anyone can come in, but people who are inside cannot attack. The skill is canceled if the Priest moves or uses another skill. Does not work against Bosses or in Guild battles. This skill Requires 1 Blue Gemstone,1 Yellow Gemstone, 1 Red Gemstone and 1 Holy Water.
Comment - I suppose if you really need to regen HP/SP in the middle of Abbey, this could be of use, but really. Mobs don’t often attack unless you’re actively looking for them or just plain unlucky.
Meditatio
Effect - When meditating (sitting), you will have a better SP recovery rate as well as increase your Maximum SP. This skill also improves the amount of HP that are healed by the Heal skill by 2% per SkillLV (sitting is of course not required).
Comment - The SP effects are good, but it increases your heal! Now that’s worth getting!
Mana Recharge
Effect - Decreases SP Cost of all your skills.
Comment - If we didn’t have to max Mace Mastery to get this, I might consider it. For a Battle High Priest, maybe.
Skill Build
Acolyte Skills
Heal 10
Divine Protection 5
Blessing 10
*Ruwach 1
Teleport 2
Warp Portal 4
Pneuma 1
*Increase Agility 10
Angelus 2-5
Cure 0-1
Decrease Agility 0-1
*If you plan on going to Amatsu Dungeon early, get the Ruwach-Pneuma skill line before Increase Agility.
GO JOB 50
There is no excuse on a 50x/50x server to do anything else.
However, if you’re particularly lazy, you can sneak by with Job 47. Add two points to Angelus and leave out Dec. Agi and Cure. (I did this on the official server and regretted it for the rest of my Priest career.)
Priest Skills
Magnificat 3-5
SP Recovery 4
Status Recovery 1
Resurrection 4
Kyrie Eleison 10
Suffragium 3
Impositio Manus 4-5
Lex Divina 5-6
Lex Aeterna 1
Aspersio 4-5
Gloria 1-3
*Sanctuary 0-8
By no means do you have to get these skills in this order (In fact, it’d be a better idea to not get them in this order).
*What you don’t put into Imp, Gloria, Mag, and Aspersio, put into getting Sanctuary. Sanctuary is a useful skill in that it’s one of the ONLY skills that can heal the Emperium in WoE. Put the last point in whatever you want.
Change as you see fit if you want more or less of any skill. We have the skill reset for a reason. =)
High Priest Skills
Magnificat 3
SP Recover 5
Impositio Manus 3
Assumptio 5
Status Recover 1
Resurrection 4
Aspersio 4
Lex Divina 5
Lex Aeterna 1
Meditatio 10
Suffragium 3
Sanctuary 7
Kyrie Eleison 4
Gloria 1
Angelus 10
Impositio Manus 5
Aspersio 5
Magnificat 5
Again, edit as you see fit. This is the build I’m currently using and it’s yet to do wrong, although I wouldn’t mind getting Magnificat 5 earlier.
Solo Leveling (With party member suggestions)
1-13 (Job level 10)
Poring Land (Where you go as a Novice)
Recommended Party Members: Yourself
Recommended Skills: None
Monsters:
- Porings. Lots of them: Just stab away. If you set your stats to a more melee build (STR, VIT, DEX) then this part will be smooth as silk. It will be a little tougher with the FS stats, but not terribly. Load up on Novice Potions while you’re there from the NPC
Item Drops:
Poring Card (Poring) - It’s not worth a lot, at all, but why not. It’s an introduction to the world of card collecting.
13-30+
Payon Dungeon 1

Recommended Party Members: Any stray players
Recommended Skills: Heal, Blessing, Increase Agility
Monsters:
- Skeleton: The easiest Undead to fight. Passive, so it won’t come after you right away. Just heal bomb it a couple of times.
Zombie: This Undead is five levels stronger than the skeleton, which makes it slightly nastier. Use the same heal bombing method as on the Skels
Familiar: You have two options: Make a stand or run. If you have enough SP to keep yourself healed and a melee weapon handy, go ahead and fight it. They aren’t particularly tough. Run otherwise (Inc. Agi helps!), or fly wing/teleport. Familars tend to mob easily, so using a fly wing is better than manually running
Poporing: Ignore…unless it looted something really good.
Item Drops:
Ribbon [1] (Familiar) - A novice slotted headgear for female characters. You’ll get better equips eventually, but if you find yourself struggling to find slotted headgear…
Grape (Familiar) - Infinitely handy when you’re short on SP
Cursed Ruby (Zombie) - Used in several quests. Keep them or sell them; it’s your choice.
Opal (Zombie) - Each one sells for 3k unovercharged, which is fairly decent. Or you can keep them.
Mace [4] (Skeleton) - If you find a bunch, try and upgrade them to +10 and then sell it.
Skeleton Card (Skeleton) - +10 ATK, 2% stun change. These work great for leveling new melee characters.
30-45
Payon Dungeon 2
Recommended Party Members: Any stray players
Recommended Skills: Heal, Blessing, Increase Agility, Pneuma
Monsters:
- Archer Skeleton: They rarely miss and, in large groups, can be a problem, but their attack power isn’t tremendously high. Heal bomb (And Pneuma, if you have it handy).
Skeleton Soldier: Lower HP than the Skeleton Archers, but a higher attack power. Unfortunately, you have no way to defend against them yet. If caught between fighting a Skel Archer and a Skel Soldier, take out the Soldier first.
Drainliar: Like the Familars, only bigger and slower. They’re a piece of cake to run from. Holy Light them, if you feel so inclined.
Eggra: They’re passive, and they’re technically not undead. Ignore them.
Apple of Archer (Archer Skeleton) - +3 DEX, which is great for any class. Keep one for yourself and sell the rest.
40+
Orc Dungeon
Recommended Party Members: Swordsman and Mage; they’re fairly common down there
Recommended Skills: Heal, Blessing, Increase Agility
Monsters:
- Orc Zombie: Heal Bomb. They’re slow, but there are a ton of them down there. Avoid mobs, unless you have a party handy.
Orc Skeleton: Similar to the Zombies, but stronger and faster. Heal bomb them first, if possible
Steel Chon Chon: Dirty little looters. Ignore them and take care not to accidentally hit one. They will mob, and the last thing you want is even more monsters piled onto the zombie mobs. If you have a party, they can take care of the bugs, but it really isn’t worth it.
Item Drops:
Emperium (Orc Zombie) - Used to form a guild, in several item quests, or to sell in the market.
Orc Zombie Card - Place in a slotted garment, this car reduces the damage taken from Undead by 30% and gives a flee rate increase of +5.
Payon Cave 3
Recommended Party: Anything Melee
Recommended Skills: Heal, Blessing, Increase Agility
Monsters:
- Archer Skeleton: Same as Payon 2
Soldier Skeleton: Same as Payon 2
Poporing: Same as Payon 1. Holy Light if you want to fight it for whatever reason.
Mandragora: Psh. Just run past them. They’re level thirteen and more annoying than anything.
Hydra: Slightly stronger than Mandragora and, unless a farmer’s been through recently, much more numerous. Avoid them, but if you want the card, use Pneuma and Holy Light.
Ninetail: Flee!!!
Munak and Bongun: Heal bomb until they drop. The Bongun will occasionally stun you. Heal as soon as possibly, and continue heal bombing. They both drop an item that can be exchanged for the other’s taming item. Bongun will drop Old Portrait (Trade in Izlude) and Munak will drop Girl’s Diary (Trade this and a Daenggie in Comodo).
Shoes [1] (Munak) - This is one of the most valuable easily accessible equips for Priests. Find it if you can!
Munak Hat (Munak) - Decreases damage from Undead by 10%. Considering that you’ll be fighting a lot of Undead, you might as well look for one. Unfortunately, it takes up all three headgear slots.
Worn Out Scroll (Bongun) - I’ve heard a rumor that using a Worn Out Scroll will give you exp. Needs to be confirmed.
45-70+
Amatsu Dungeon 1
Recommended Party: None. Take all that glorious EXP for yourself!
Recommended Skills: Heal, Blessing, Pneuma (REQUIRED!), Increase Agility
Monsters:
- Antique Firelock: Meet your new best friend. Pneuma, Heal bomb, level, repeat. If you find a group of three or more, you’re in luck! Have a party!
Miyabi Doll: Ignore them. They won’t hurt you as long as you don’t hurt them.
Shinobi: This is the real reason Acolytes have the Increase Agility Skill. If you see a box on the floor, or the Shinobi himself, run away in the other direction as soon as possible. If you’ve got the floor layout memorized, you’re gold.
* Remember that the goal here is NOT to reach the end, but to exorcise the Firelocks. Investigate all of the extra rooms and corners.
* Sometimes you’ll find yourself still getting hit, even with Pneuma on. Move a little ways away, and the server will fix itself. Then move back into the Pneuma.
Item Drops:
Apple of Archer (Antique Firelock) - +3 DEX, which is great for any class. Keep one for yourself and sell the rest.
Antique Firelock Card (Antique Firelock) - Sells well in the market, or you can keep it for yourself. If put in shoes with a refinement of +9 or +10, it gives a +10% bonus to HP and SP
Priest - 80
Glast Heim Church
Recommended Party: If you can find someone that wants to go, bring them along. I find it easier to level here alone, personally.
Recommended Skills: Heal, Blessing, Increase Agility, Magnificat, Kyrie Eleison/Assumptio (Keep Mag on at all times!)
Monsters:
- Evil Druid: Your nemesis. Heal bomb him and yourself. He should go down in about thirteen heals (drawing from memory here). If he starts to cast a spell, just endure it. You should have more than enough MDEF to handle it.
Wraith: Weaker in HP, but stronger in ATK than the Evil Druid. About six-eight heals should take care of him.
Ghoul: More annoying than anything. Heal bomb them if you’re feeling bored. It will only take three-and-a-half heals.
Mimic: TELETELETELETELETELETELE! As soon as you see one, teleport! They aren’t life-threatening (for the most part), but don’t try to take it on alone.
Dark Illusion: 90% of the time, you can survive long enough to run away. Otherwise, just laugh self-pityingly as he floats over your prostrate body. Some day, you may come back to have your revenge. He is Undead, after all.
Evil Bone Wand (Evil Druid) - An AWESOME rod dropped here. It’s unslotted and Undead (Meaning that you’ll never be able to use it melee-style. Why would you?), but it increased INT by four.
Biretta [1] (Evil Druid) - A useful slotted headgear that only takes up the top head space.
Bible [2] (Evil Druid) - +2 INT, no MATK bonus. Uhhh…
Glast Heim Churchyard
Recommended Party: Solo
Recommended Skills: Heal, Blessing, Increase Agility, Magnificat, Kyrie Eleison/Assumptio (Keep Mag on!)
Monsters:
- Evil Druid: There are only ten here, compared to the church building’s sixty. Meh.
Wraith: Unlike the Evil Druids, there are nine times as many Wraiths here as in the Church.
Ghoul: Heal Bomb. Hope for drops.
Hunter Flies & Mimics: Teleport or run away. The Hunter Flies aren’t as immediately dangerous as the Mimics, but they have the capability to be just as annoying.
Dark Lord: If you’re lucky, some MVP party already took care of him.
Nifflheim
Recommended Party: Anything melee
Recommended Skills: Heal, Blessing, Increase Agility, Magnificat, Kyrie Eleison/Assumptio
Monsters:
- Dullahan: At lower levels, Dullahan presents quite a challenge. If you have Assumptio as a High Priest, use it (Kyrie Eleison if you‘re a normal Priest). Then just heal it and yourself.
Quve: I find them entertaining, personally. Heal, even if they transform into Lude.
Others: If you’re alone, just teleport away.
Party Leveling:
13-30
Recommended Party: Swordsman, Thief
Recommended Skills: Heal, Blessing, Increase Agility if you stick around long enough
Locations: Smokies (Payon, east two maps), Elder Willows (Payon, east one, south one), Peco Pecos (Payon, two west), Culverts (Warpra),
30-45
Recommended Party: Swordsman, Thief, Mage (Argiopes)
Recommended Skills: Heal, Blessing, Increase Agility
Locations: Payon Caves (Warpra), Argiope (Between Prontera and Al De Baran), Location of party members’ choosing.
45 to Priest
Go to Amatsu. If you already have a party organized, you can stick with them, but don’t waste time with a chatbox in Ostia.
Priest +
Anywhere! You’re Full Support, which means that where your party goes, you go.
Suggestions:
Magma Dungeon - Best with a Wizard and a Melee character.
Byalan Island 4-5 - Best with Wizard and/or a melee character.
Pyramids - There is the occasional undead to heal bomb here, but you will probably be with a party and should therefore concentrate mostly on healing and buffing
Sphinx 4 - This is fun. >D Lex Divina the Anubis, Heal bomb if you have enough SP, but concentrate on your party members. If you have a TU build, you can solo here.
Turtle Island Inside - Bring a Monk and Lex Aeterna. LA the turtles and have the Monk Occult Impact them (or use the over-powered skill of their choosing).
75 - 99
The Cursed Abbey
Recommended Party: Wizard, Tank (Sader, Knight, or Steel Body Monk), etc. Go to the entrance and there should be several party requests open.
Recommended Skills: Blessing, Increase Agility, Heal, Kyrie Eleison/Assumptio, Magnificat, Suffragium, Aspersio, Impositio Manus, Resurrection, Lex Divina, Gloria, Angelus (In other words, use Battle Mode)
Monsters:
- Banshee: This is the one you should worry about. Use Lex Divina as soon as possible and hope that it silences her. If not, keep trying, but don’t neglect your party! If she gets off that purple AoE spell, just step out of it and continue.
Ghoul: Same as in Glast Heim
Zombie Slaughter: If you find yourself with an excess of SP, heal bomb it, but ONLY if you have full SP and your party members aren’t in immediate danger.
Ragged Zombie: If you find yourself with an excess of SP, heal bomb it, but ONLY if you have full SP and your party members aren’t in immediate danger.
Hell Poodle: Let the others take it. Holy Light if you have nothing else to do or if you have Soul Link on.
Flame Skull: Let the others take it. Holy Light if you have nothing else to do or if you have Soul Link on.
Necromancer: You’ll be too busy healing and buffing your allies, but if you get the chance, you might as well heal bomb. =D
Fallen Bishop: Keep your sound on. If you so much as hear it in the distance, turn around.
Tidal Shoes [1] (Ragged Zombie) - If you’ve been on the server long enough, you’ll find that this is one of the most coveted items. Get it. It’s half of the Tidal Shoes/Wool Scarf Combo
Western Outlaw [2] (Ragged Zombie) - There’s a lot of controversy over this weapon. I’ve yet to see one, but if you can find it, good for you. Find a Gunslinger to sell it to.
Robe of Orleans [1] (Banshee) - It increases casting time by 15%, but makes casting uninterruptible. I imagine it would be useful.
Wool Scarf (Banshee) - The other half of the Tidal Shoes/Wool Scarf combo, which increases HP and HP recovery.
Blue Gemstone (Necromancer) - You should have more than enough Blue Gems with you (At least 100 for a short expedition), but if you happen to run out…
Lich’s Bone Wand [2] (Necromancer) - *wants* +20% MATK, +1 INT, +1 DEX, a chance to curse all enemies on the screen, and +300 SP/+2% MATK with 9-10 Refinement. To heck with the stats, I just want to see armies of monsters get cursed in an instant.

Weapon:
+10 Rod [4] - Good for card combos. Drops drop four-slotted rods a lot, so you should have no trouble finding them. Over-upgrading them, however…
Arc Wand [1 or 2] - After level 24, get an Arc Wand from Geffen until you can find something better. If you can find a double-slotted Arc Wand, even better =)
Divine Cross - If you can get the Spiritual Ring that goes with this, it might be fun.
Evil Bone Wand - Dropped By Evil Druid. Easy to get and fairly useful.
Recovery Staff - Dropped by Anubis. It increased MATK by 15%, and increases the amount healed by Heal and Sanctuary depending the refinement rate.
Survivor’s Rod - There are two versions, one for Mages and one for Acolytes. Either one will work just fine. The only difference is whether DEX is increased or INT.
Card: Fabre
Armor
Robe of Orleans [1] - Dropped by Banshees, makes casting unstoppable. This is bound to be handy with longer spells, but with the right amount of DEX, rendered useless.
Saint’s Robe [1] - Dropped by Obeaune. This is the armor staple for most Priests and one of the most practical to obtain.
Card: Peco Peco
Headgear
Upper
Biretta [1] - Dropped by Evil Druid. It’s simple, but easy to get.
Circlet [1] - Chances are, you’ll find a Biretta first. The circlet raises MDEF by 3, which you hardly need anything.
Crown/Tiara [1] - +1 INT. Hard to get though, and gender-specific
Donation Items:
Viking Helm, Golden Flower, Angelic Tiara, Witch’s Head Ornament, Bhaal Helm
Middle
Sunglasses [1] - Nigh impossible to get, but consider yourself lucky if you find a pair. Obtainable through the Kafra raffle in Al De Baran, if memory serves…
Donation Items:
X of Tactics, X of Intelligence, X of Might&Magic, X of Red Bull, X of Equality
Lower
Gangster Mask - Dropped by Zerom. Gives a 15% resistance to the silence status.
Donation Items:
Any but Western Headscarf
Multi-Space Headgear
Munak Hat (Top, Middle, Bottom) - Dropped by Munak. 5 DEF, impossible to refine, 30% less damage from undead
Opera Masque (Middle, Bottom) - Great DEF and relatively easy to get. Take 20 Iron (From the Firelocks), a Singing Plant (Metaller), and 5,000 zeny to a building in Al De in the 3:30 direction.
Card: Elder Willow, Marduk
Shield
Buckler [1] - Dropped by Goblins and Kobolds
Guard [1] - Dropped by Pupa and various other larvae-stage and egg-type monsters
Card: Race-Modifying Cards (i.e. Thara Frog), Pupa
Garment
Hood [1] - Dropped by Cookies in Toy Factory
Muffler [1] - Dropped by Sohee in Payon Caves 4. A monster to get, but entirely worth it. Just buy one from the vending map if you’re desperate. (ID is 2504)
Heavenly Maiden Robe [1] - Dropped primarily by High Priest Margaretha in Bio Labs
Wool Scarf [1] - Dropped by Banshees in the Abbey. Spend enough time there and you might be lucky enough to find one. =)
Card: Raydric
Footgear
High Quality Sandals [1] - Dropped by Isilla in Rachel Sanctuary
Sandals [1] - Since you will probably fight Munak long before Cookies, there’s no real reason to get these except that they’re more common and therefore much less painful to over upgrade.
Shoes [1] - Dropped by Munak. Very useful basic footgear.
Tidal Shoes [1] - They’re Tidal Shoes. Fight Ragged Zombies and hope for the best.
Card: Sohee, Verit, Antique Firelock
Accessories
Clip [1] - Back on iRO, this used to be one of the most wanted items. Not so much anymore. +10 SP and a slot.
Earring [1] - +1 INT each and slot, which is fairly good.
Necklace [1] - +1 VIT
Nile Rose [1] - The HP equivalent of the Clip. Once upon a time, they gave +5 to all stats…
Rosary [1] - +1 LUK and +3 MDEF. The unslotted variety is easily obtainable through the Prontera Church
Card: Phen, Zerom
SP Conservation
This strategy is nowhere near as useful here as on lower rate servers, but nevertheless…
Let’s take a hypothetical Acolyte, level 21/11. 41 INT+1 +2 (Job Bonus and Staff). This Acolyte, healing a Skeleton, does 504 damage to the Skeleton, who only has 234 HP. Over kill! This is just wasting SP that could be better put to use fighting more Undead. Instead, lower the Heal’s level to do just enough damage to beat the monster.
In the situation:
Skeleton: 234 HP
Zombie: 534 HP
Acolyte’s Heal
1 - 72
2 - 120
3 - 168
4 - 216
5 - 264
6 - 312
7 - 360
8 - 408
9 - 456
10 - 504
Skeleton : Level 5 Heal
Zombie: Level 10 Heal + Level 1 Heal
The Acolyte also has lower HP than what Heal heals (Approximately 236), so the Acolyte could use the level five heal to heal himself as well.
Since on feelRO, we level up so quickly, SP really isn’t a problem in lower levels and Priests usually don’t have a problem with low SP (Usually). However, this tactic can be useful in some situations. A good rule of thumb is to have two levels of Heal ready, typically level 10 and 5. Use them when needed. Ghouls, for example, usually die in three level ten Heals and one level five.
Partying
Who Gets What Buff?
All Characters get…
Blessing, Increase Agility, Angelus, Magnificat, Assumptio/Kyrie Eleison, and Gloria
Melee and Ranged Characters also get…
Impositio Manus and Aspersio (When fighting Shadow/Undead)
CRIT characters will also need a constant Gloria
Magic Users get…
Suffragium and Safety Wall
Buff Timing
This is an imperfect method, but it helps organize things a little in parties.
When you buff anyone, also buff yourself, especially with Blessing, Agi, and KE/Assumptio. When your buff runs out, so does there’s. Also, all buffs need to be reset when a player dies.
Suffragium cannot be cast on yourself, but it only lasts for 40 - 10*SkillLV seconds and only for one spell, so cast it on Wizards between each of their spells if possible.
Battle Mode
As soon as you think about making an FS Priest, learn the battle mode. Priests have a lot of skills, way more than what will fit on one row of hotkeys.
| Quote: |
| “By typing /bm, the three rows of hotkeys will be mapped to the letter keys on the keyboard. The F-keys become row 1, ‘qwerty’ becomes row 2, ‘asdfghjkl’ becomes row 3, and ‘zxcvbnm,.’ also becomes row 1.” ~Lord Disa |
If you’re right-handed, your right hand will be on the mouse and your left hand should be on home row (Fingers on ASDF). Because of this, the skills you use the most will need to be on those keys.
The way I organize it is like this: QWERTYUIO are my buff keys. ASDFGHJKL are my ‘offensive’ keys. ZXCVBNM,. are my auxiliary keys.
Row 2 Hotkeys
Q - Blessing
W - Increase Agility
E - Assumptio
R - Impositio Manu
T - Aspersio
Y - Magnificat
U - Resurrection
I - ---
O - Teleport
A - Heal 10
S - Heal 5
D - Lex Aeterna
F - Lex Divina
G - Pneuma
H - Ruwach
J - ---
K - Warp Portal
L - Teleport
Z - Aqua Benedicta
X - Green Potion
C - Holy Water
V - ---
B - ---
N - ----
M - ----
, - ---
. - ---
The visible hotkey bar should contain your consumable items and your switchable gears (If you're using more than one kind of weapon or armor). That way, you can easily tell what you have equipped, which key switches to the other equips, and the status of your consumable items supplies. (Thanks to Foul Play for mentioning this!)
Set them up however you feel comfortable and memorize them. If you have difficulty remembering them (and it’s your own keyboard that you don’t mind wrecking) you can put small blank stickers with the name of the spell written on it on the respective keys. (I did this way back when. My family complained all the time XD)
To activate the keys, type in /bm
Hit enter/return to toggle between battle mode and normal mode. If you don’t, you may end up using a ton of spells when you just want to greet someone. XD
Sometimes, when warping to a new map, the battle mode will come off. Just hit enter until it comes back.
Your comments are appreciated! If you like the guides, please subscribe via email or feeds. Read quality guides only here at Ragnarok Job Guides!
No comments:
Post a Comment
No Racist or abusive comments please.